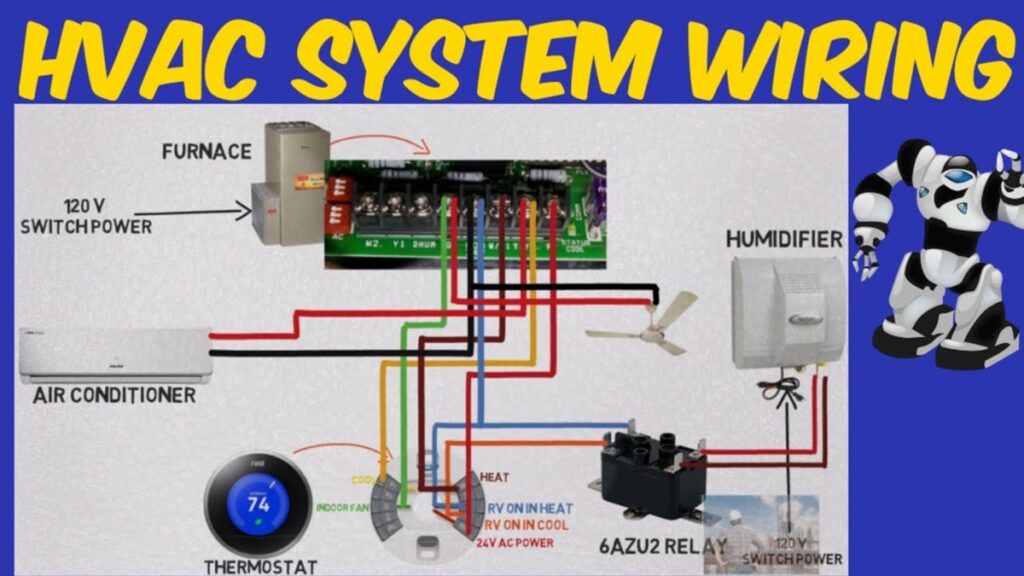
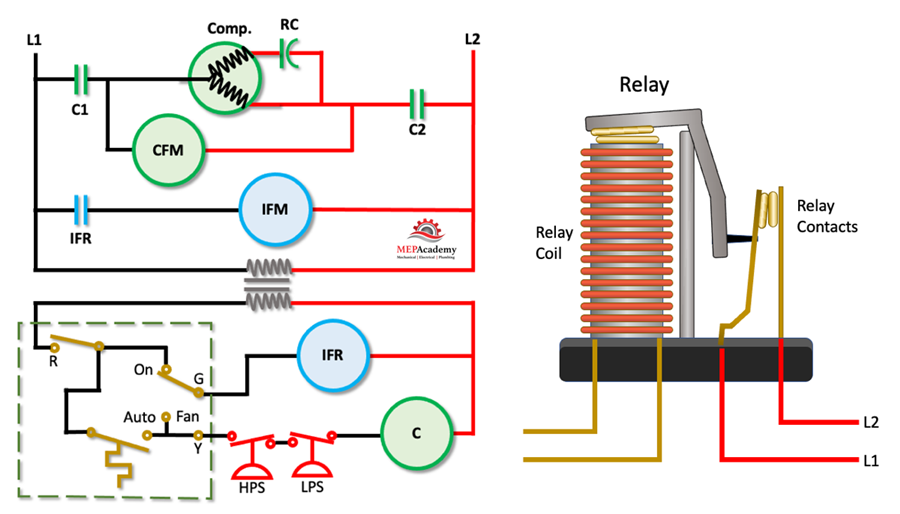
When installing a heating, ventilation, and air conditioning (HVAC) system, proper wiring is crucial for both performance and safety. Whether you’re a professional technician or a DIY enthusiast, understanding how to wire an HVAC system is an essential skill that ensures the efficient operation of the equipment. In this guide, we will provide you with a step-by-step approach to wiring your HVAC system, covering everything from understanding wiring diagrams to essential safety precautions.

Understanding HVAC System Wiring Components
Before diving into the wiring process, it’s essential to familiarize yourself with the key components that make up the electrical system of an HVAC unit. These parts include:
Thermostat: The control system that regulates the temperature by communicating with the HVAC unit.
Control board: The heart of the HVAC system’s electrical operations, responsible for sending signals to other components.
Furnace: The heating unit in the HVAC system, which requires specific wiring for the blower motor, igniter, and safety mechanisms.
Air Handler: An integral part of the system that circulates air through the ducts.
Condenser: Part of the air conditioning unit, requiring power for its compressor and fan.
Cables and Wires: Conductive paths that transfer power from one component to another.
By understanding these components, you can better plan the wiring process.
Step 1: Turn Off the Power Supply
The first and most important step before starting any wiring job is to disconnect the power supply. Failure to do so can lead to electrical shock, fires, or severe damage to the HVAC system. Always switch off the main electrical supply at the circuit breaker before beginning the installation or maintenance process.
Step 2: Install the Thermostat Wiring
The thermostat is the primary interface for controlling the HVAC system. Begin by installing the thermostat wiring. This involves connecting the R wire (power) from the furnace to the R terminal on the thermostat. This wire will provide constant power to the system.
Next, connect the C wire (common) to complete the circuit and ensure continuous power to the thermostat. The Y wire connects to the cooling system, while the W wire is responsible for heating operations. For dual fuel systems, you may need additional wires to control specific components.
Ensure all wires are properly secured and that there is no exposed copper to avoid short circuits.
Step 3: Wire the Furnace
The furnace is a crucial element of the HVAC system. Its wiring typically includes connections to the blower motor, ignition system, and safety features. Here’s how to wire the furnace properly:
1. Blower Motor: Connect the wire that controls the blower motor to the corresponding terminal on the control board. This is usually the G terminal, which regulates the fan operation.
2. Igniter: If your furnace uses an electronic ignition system, connect the igniter wire to the control board’s designated terminal. This ensures that the furnace will light up when heating is required.
3. Limit Switch: The limit switch prevents overheating by cutting off the power if the system becomes too hot. Make sure the wiring from the limit switch to the control board is intact and properly connected.
4. Grounding: Proper grounding is crucial for safety. Ensure that all components, including the furnace and control board, are correctly grounded to prevent electrical surges.
Step 4: Wiring the Air Handler
The air handler is responsible for moving air through the ductwork. Proper wiring ensures the blower motor and auxiliary heating elements work efficiently. Begin by connecting the blower motor’s wires to the control board. The G terminal is typically used for the fan motor.
For air handlers with auxiliary heating elements, you may need to wire them into the control system via dedicated W1 and W2 terminals. Make sure all connections are tight and insulated to avoid short circuits.
Step 5: Connect the Condenser
The condenser unit is an essential part of the air conditioning system. Its wiring involves connecting the compressor and fan to the control system. Here’s how to do it:
1. Compressor Wiring: Connect the power wire from the condenser unit to the designated C terminal on the control board to ensure the compressor operates correctly. This wiring should be secure to handle high power loads.
2. Fan Wiring: Similarly, connect the fan motor wire to the F terminal on the control board. This ensures the condenser’s fan operates as part of the cooling cycle.
3. Capacitor: Many condenser units use a capacitor to help start the compressor. Check the wiring diagram for your specific model to ensure the capacitor is correctly wired.
Step 6: Properly Secure All Wires
One of the most critical parts of wiring an HVAC system is ensuring that all wires are secured and insulated properly. Loose or improperly secured wires can lead to short circuits, overheating, or even fire hazards. Use wire ties or wire clips to keep all wires in place, and never allow any wire to come into contact with hot surfaces or moving parts.
Ensure that the wires are also routed to avoid pinching or wearing, especially in areas where they may be exposed to high temperatures or mechanical stress.
Step 7: Test the System
Once you’ve completed all wiring connections, it’s time to test the system. Turn the power back on at the circuit breaker and check for any potential issues:
Thermostat: Ensure the thermostat is correctly controlling the system by adjusting the temperature and checking whether the furnace or air conditioner responds.
Furnace and Blower: Turn on the heating system and ensure that the blower motor operates properly, delivering warm air to the ducts.
Cooling: Switch the system to cooling mode and verify that the condenser unit operates, cooling the air efficiently.
Safety Mechanisms: Test the limit switch, pressure switch, and other safety devices to ensure they’re functioning correctly.
If everything is working as expected, your HVAC system is now properly wired and ready to provide consistent and reliable heating and cooling.
Common Wiring Errors to Avoid
Wiring an HVAC system requires attention to detail and understanding of the electrical components. Here are some common mistakes to avoid:
Improper Wire Connections: Always double-check each connection according to the wiring diagram to avoid short circuits or malfunctioning.
Overloaded Circuits: Ensure the wiring is properly sized to handle the load of the HVAC system. Overloaded circuits can trip breakers or cause fires.
Neglecting Grounding: Failing to ground the system correctly is a serious safety issue and should never be overlooked.
Ignoring Local Codes: HVAC wiring must adhere to local electrical codes. Ensure you understand the regulations in your area to avoid violations and ensure safety.
Conclusion
Wiring an HVAC system may seem daunting, but with the proper knowledge, tools, and safety precautions, it can be done efficiently and effectively. By following the steps outlined in this guide, you can ensure that your HVAC system is properly wired, safe, and ready for optimal performance. Always consult the manufacturer’s wiring diagrams and local regulations to guarantee a successful installation.
