
Maintaining an HVAC system is crucial to ensuring the efficiency and longevity of your heating, ventilation, and air conditioning unit. One of the simplest yet most effective ways to enhance the performance of your HVAC system is by regularly changing the air filter. The air filter plays a significant role in trapping dust, debris, and allergens, preventing them from circulating in your home. In this comprehensive guide, we will walk you through the process of changing the filter in your HVAC system to ensure your unit runs smoothly and efficiently.

Why is it Important to Change the HVAC Filter?
Before diving into the step-by-step instructions, it’s essential to understand the importance of changing your HVAC system filter. Over time, filters accumulate dirt, dust, pet dander, and other contaminants. When the filter becomes clogged, it reduces airflow, forcing the HVAC system to work harder and consume more energy. A dirty filter can also lead to poor indoor air quality, which can trigger allergies, respiratory issues, and other health problems.
By changing your HVAC air filter regularly, you not only improve air quality but also ensure optimal efficiency, lower energy bills, and extend the lifespan of your HVAC system. Ideally, air filters should be replaced every 30 to 90 days, depending on factors like the type of filter, your home environment, and how often your system is used.
How to Choose the Right HVAC Filter
Choosing the right air filter for your HVAC system is essential for effective performance. The filter you select should be compatible with your system’s requirements and designed to trap the specific contaminants present in your home.
Types of HVAC Filters
1. Fiberglass Filters: These are the most basic and affordable filters. They capture large particles like dust but are not effective at trapping smaller particles like pollen or pet dander.
2. Pleated Filters: Pleated filters are made from polyester or cotton folds and are more efficient at trapping smaller particles. They offer a higher MERV (Minimum Efficiency Reporting Value) rating, which means they can capture a wider range of airborne particles.
3. HEPA Filters: High-Efficiency Particulate Air (HEPA) filters are among the most effective in trapping tiny particles like bacteria, viruses, and allergens. They are ideal for homes with allergy sufferers or those wanting the highest level of air purification.
4. Washable Filters: These filters can be cleaned and reused, making them a cost-effective option in the long run. However, they need to be cleaned thoroughly to maintain efficiency.
When selecting a filter, consider your system’s size, the level of filtration required, and whether you have any special needs, such as dealing with allergies or pets. Consult your HVAC system’s manual for the manufacturer’s recommendations.
Step-by-Step Guide: How to Change the Filter in Your HVAC System
Changing the air filter in your HVAC system is a straightforward task, but it’s important to follow the right steps to ensure you do it correctly. Here’s a detailed, easy-to-follow guide:
Step 1: Turn Off the HVAC System
Before you begin, ensure that the HVAC system is turned off. This is important for safety reasons, as you don’t want the fan running while you’re handling the filter. Switch off the thermostat and shut down the system’s power to avoid any electrical hazards.
Step 2: Locate the Air Filter
In most HVAC systems, the air filter is located either in the return air duct, blower compartment, or near the air handler. The location can vary depending on the type of HVAC system you have, but it is usually easy to find. Look for a rectangular or square slot where the filter is inserted.
If you’re unsure of the location, consult your HVAC system’s manual for guidance. Some systems have a cover panel that you need to remove to access the filter.
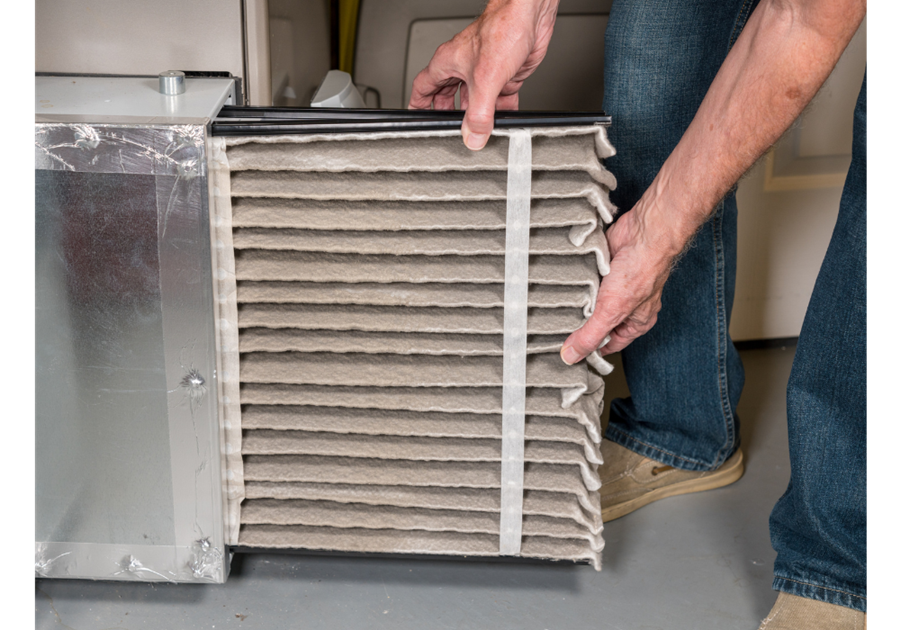
Step 3: Remove the Old Filter
Once you have located the air filter, carefully slide it out of its slot. Be cautious when handling the filter as it may be filled with dust and debris. If the filter is difficult to remove, gently wiggle it out or check for any securing mechanisms (like clips or screws) that may be holding it in place.
If the filter is disposable, you can simply discard it. If you are using a reusable filter, clean it thoroughly according to the manufacturer’s instructions.
Step 4: Check the Filter Size and Type
Before inserting a new filter, it’s important to verify the size and type of the filter. Filters come in various sizes, and using the wrong size can lead to poor airflow and system inefficiency. The size of the filter is usually printed on the side of the old filter. It will typically have the dimensions in inches, such as 16” x 20” x 1”. Ensure that the new filter matches the old one’s dimensions and is suitable for your HVAC system.
Step 5: Insert the New Filter
Insert the new air filter into the slot, ensuring it fits snugly. Make sure the filter’s airflow direction is aligned properly. Most filters have an arrow indicating the direction in which air should flow. The arrow should point toward the HVAC unit and away from the return air ducts. Incorrect placement of the filter can cause it to work inefficiently and damage the system.
Step 6: Reassemble the HVAC Unit
After inserting the new filter, replace any covers or panels that were removed. Ensure everything is securely in place. Double-check that the filter is correctly positioned and there are no gaps around the edges.
Step 7: Turn On the HVAC System
Once the new filter is in place, turn on the HVAC system and check for proper airflow. You should immediately notice a difference in air quality. Keep an eye on your system for the next few hours to ensure that everything is working smoothly.
Additional Tips for Maintaining Your HVAC System
1. Regular Filter Replacement: Replace your HVAC filter regularly to prevent buildup and ensure optimal performance. The recommended frequency is every 30 to 90 days, depending on usage.
2. Check the Filter’s Condition Monthly: Even if you’re not due for a filter change, it’s a good idea to check your filter once a month for any excessive buildup. If it looks dirty, it’s time to replace it.
3. Choose the Right Filter: Select a filter that suits your needs. If you have allergies or pets, consider investing in a high-efficiency filter like a HEPA filter.
4. Professional Maintenance: In addition to changing the filter, schedule regular professional maintenance for your HVAC system. A technician can inspect your system, clean the coils, and ensure everything is functioning properly.
Conclusion
Changing the air filter in your HVAC system is a simple yet essential task that can significantly improve air quality, energy efficiency, and the lifespan of your system. By following the steps outlined in this guide, you can ensure that your HVAC system is running at its best. Remember to choose the right filter for your home and change it regularly to keep your system in top condition.